Cabinet wood
In my last post I wrote about all the considerations I have to make before even starting the project. One of these things is choosing the dimensions of the cabinet. I went with the widebody dimensions Williams used during the 1990s, as this gives me more room for a big playfield screen. The only difficulty with these dimension is the fact that they are in inches. Since hardware shops over here do not sell 3/4″ plywood or MDF I converted the dimensions to millimeters and rounded down to whole mm’s or the next best option. In case of the thickness I went with 18mm.
The drawing plans below show the global dimensions of my pinball cabinet:
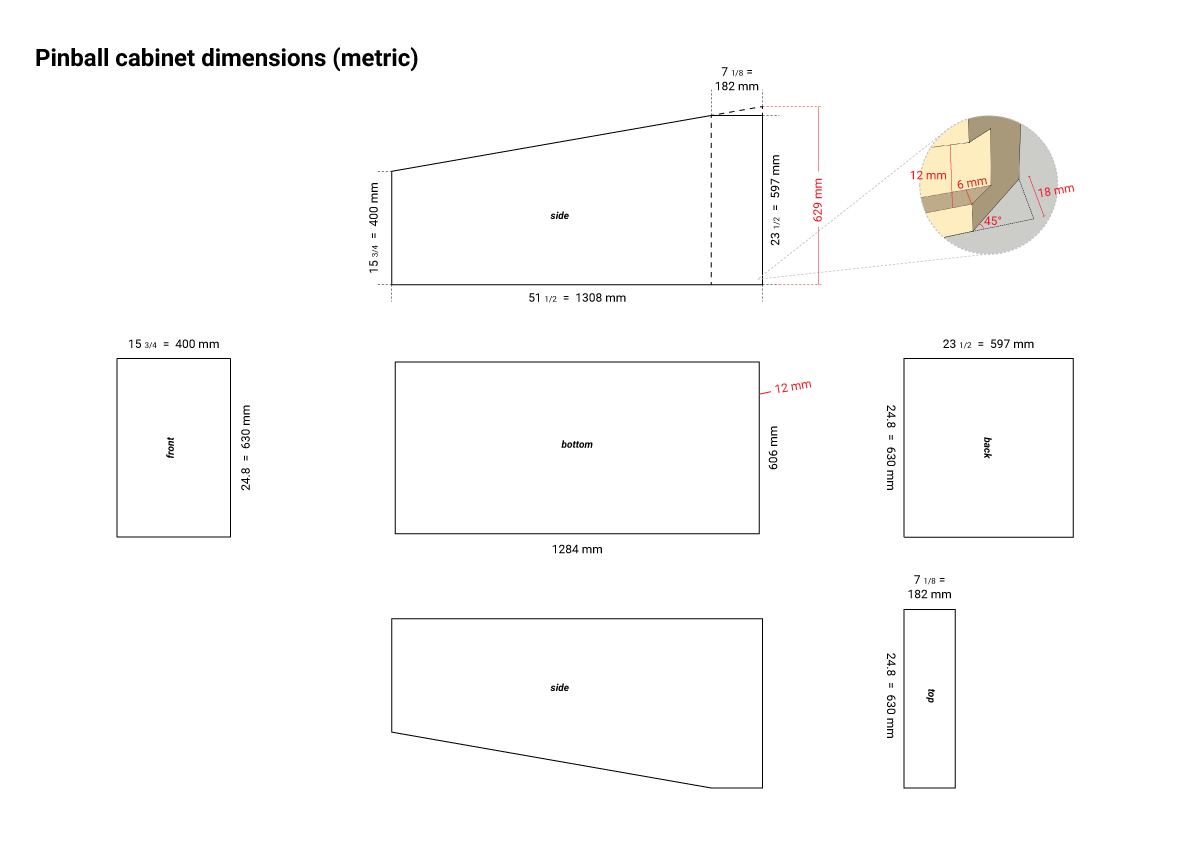

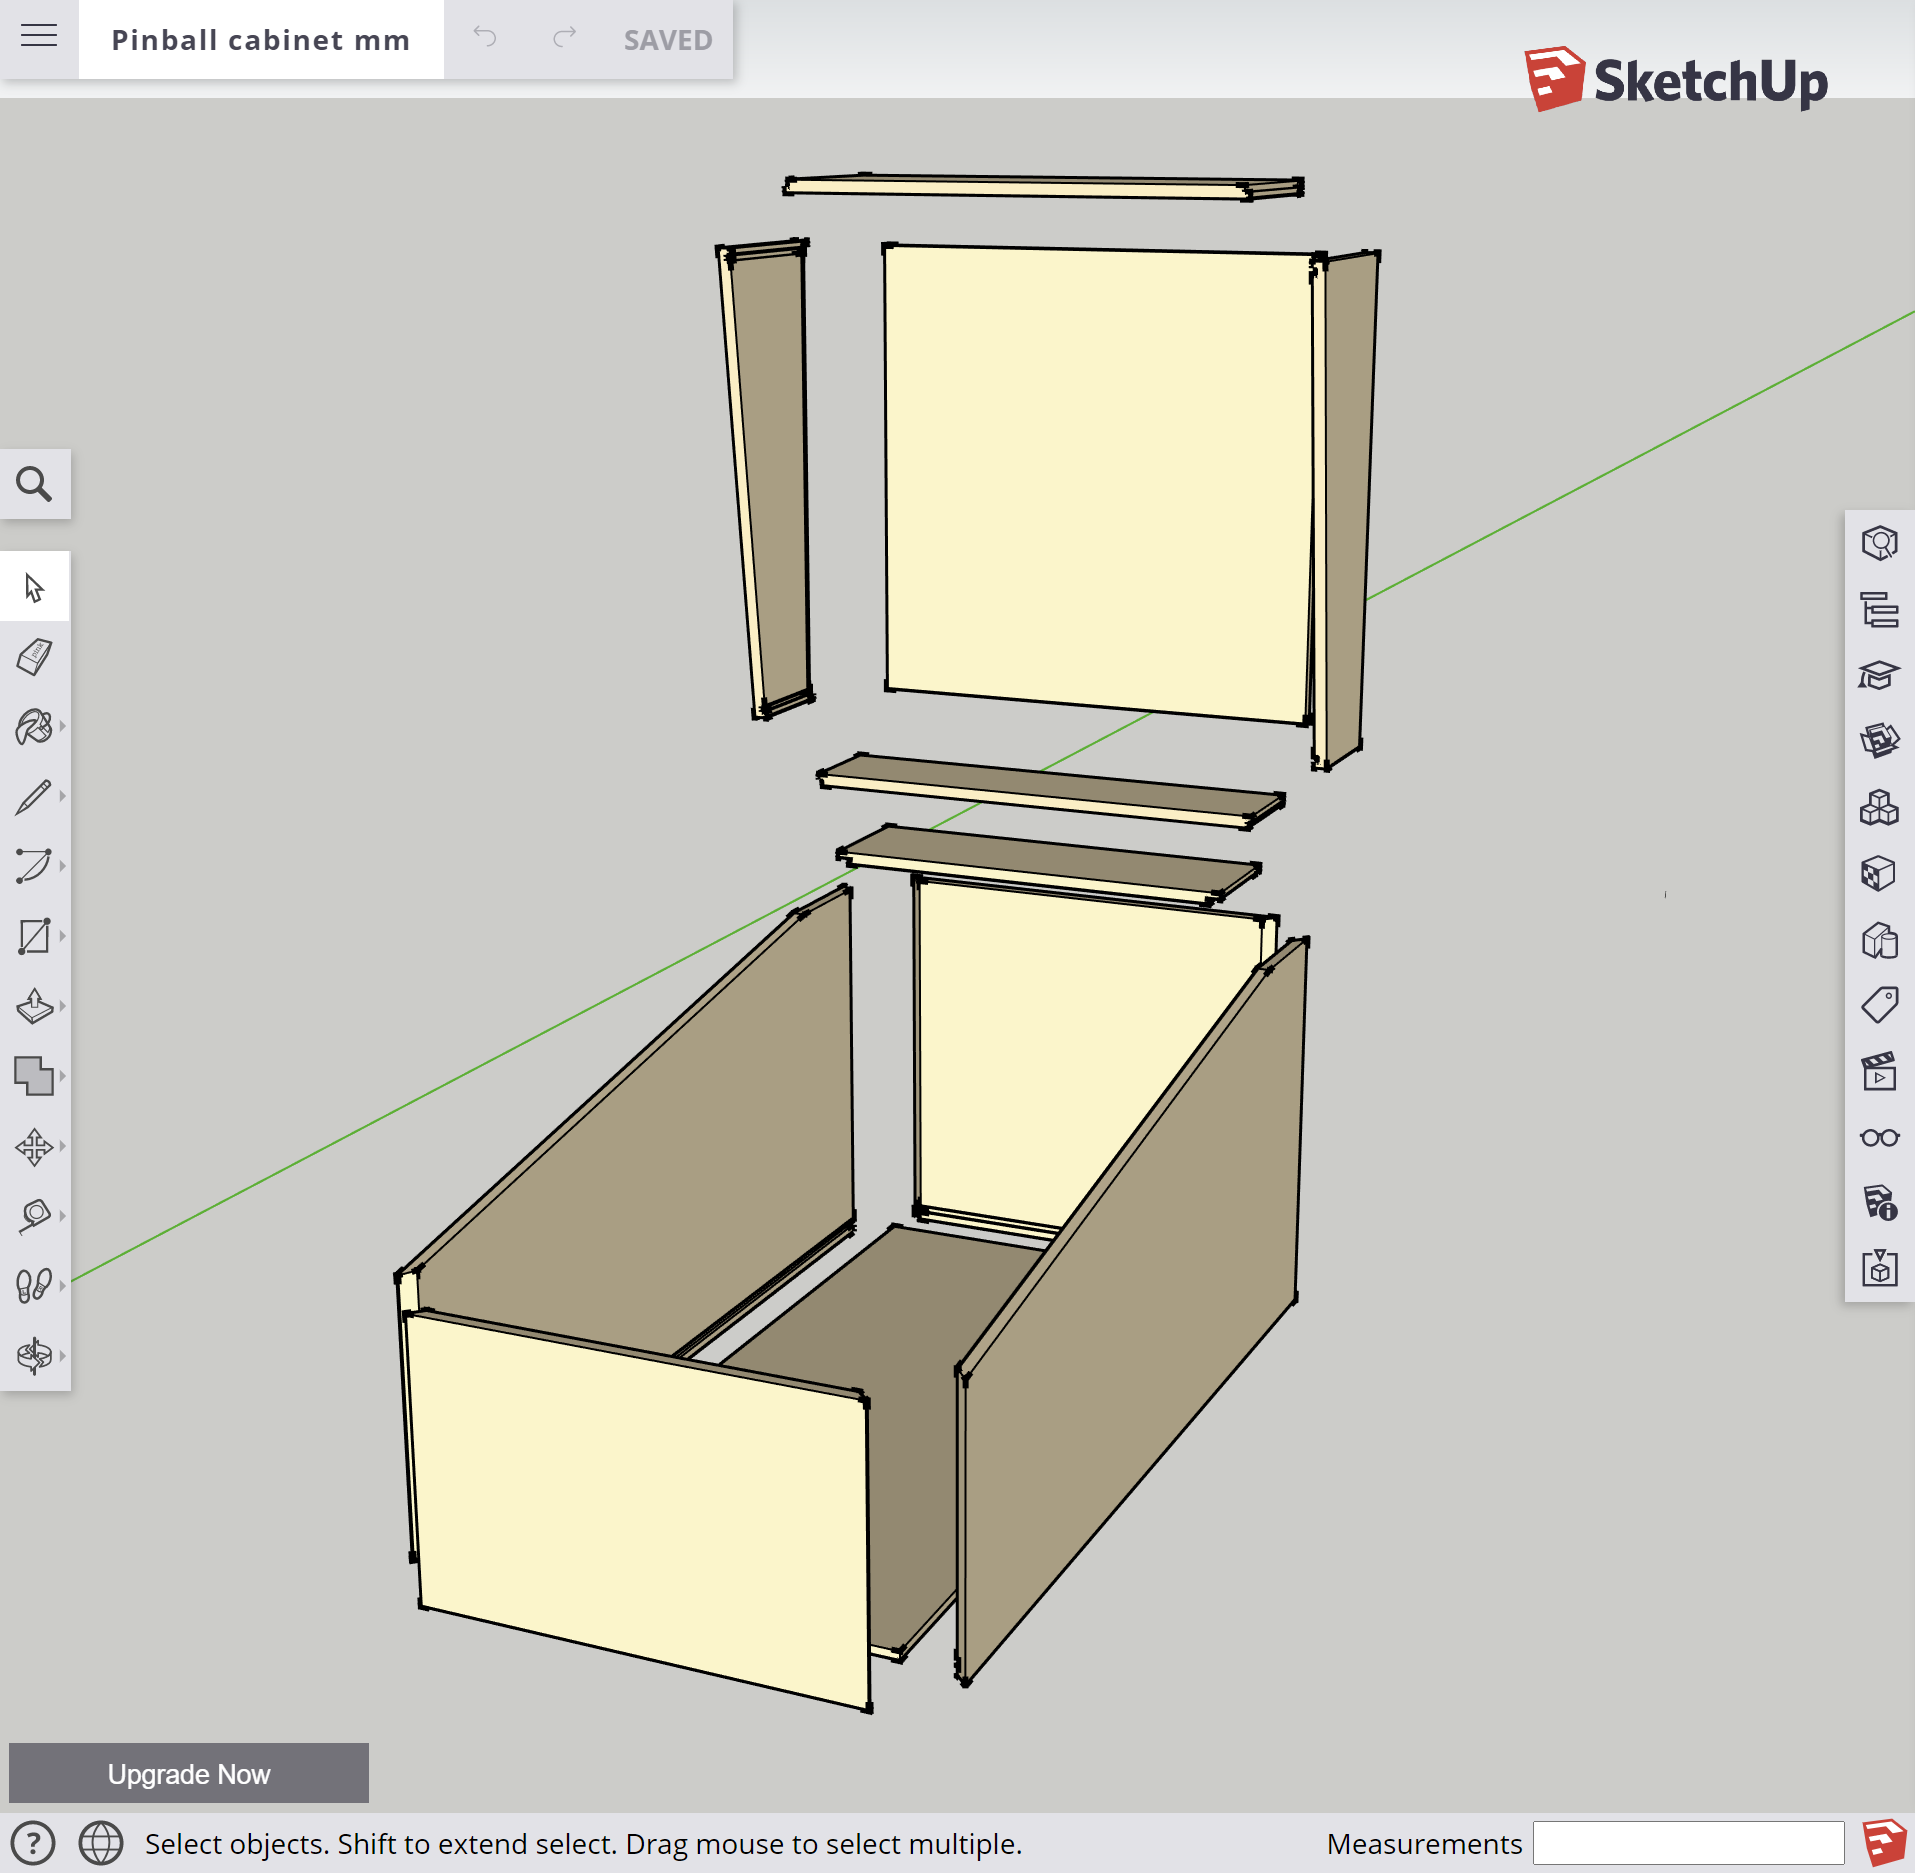
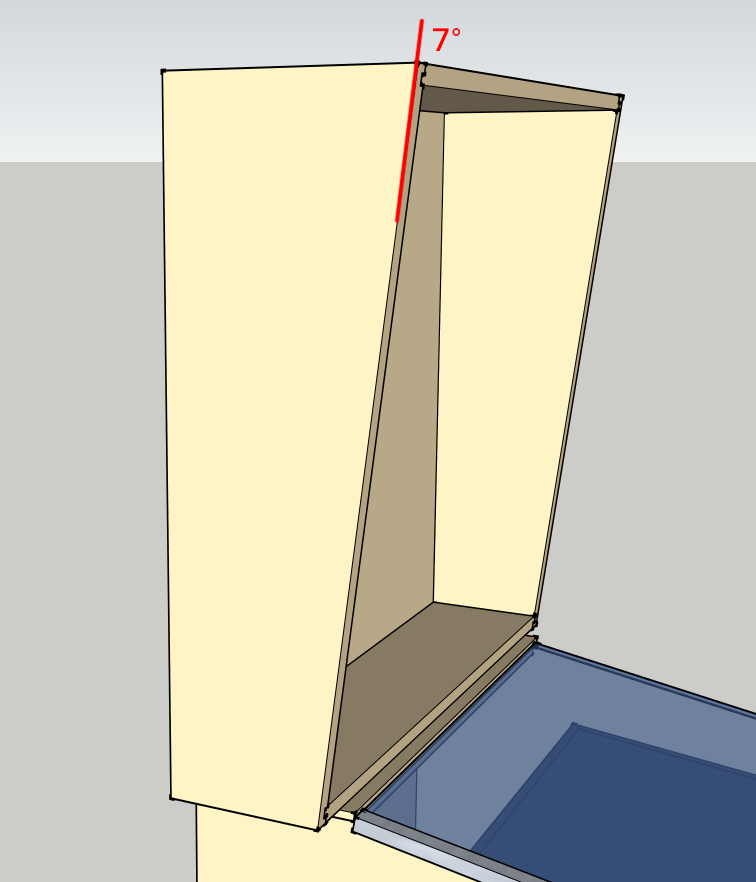
Now that the dimension plan is ready I can order the materials for the cabinet. The webshop I order from allows me to choose different materials, finishes, shapes and edging. I chose pre primed MDF for all of the visible parts of the cabinet. This will save me time when painting the cabinet. For the bottom of the cabinet and the back of the backbox I chose blank MDF, to reduce costs. The sides, front and back of the cabinet are also provided with 45 degree miter cuts. The front faces of the top and bottom of the backbox are provided with a 7 degree miter cut, to align with the slope of the sides.
The total costs of the wood were €155, shipping included. Not bad, compared to the price of a pre-assembled kit. Of course, we chose MDF instead of plywood, and we still have to make all the cuts ourselves… but I personally think that should be part of the hobby =)
Other cabinet hardware and materials
Apart from wood I also bought the first “batch” of hardware materials for the cabinet. Side rails, the lockbar mechanism, legs, a coin door, and plastics for guiding the playfield glass. With these materials we can almost start building!